
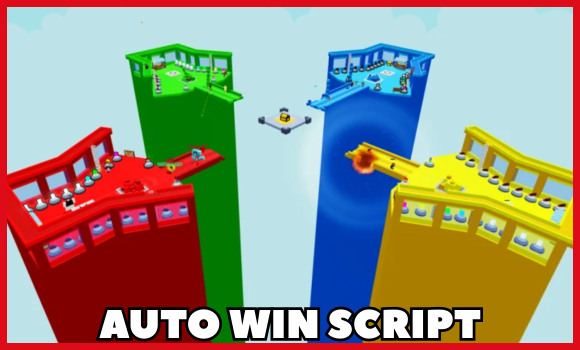
- 2026-11-12 — Added Script #2: Bridge Battles Pro Hub.
Features:
- Auto Block – Blocks attacks automatically for better defense.
- Easy Wins – Helps you win battles with little effort.
Tip – Always use trusted executors and consider testing scripts on an alt account first. If you’re ready to go, just copy the code below and paste it into your executor to get started safely.
Bridge Battles! Script:
loadstring(game:HttpGet("https://raw.githubusercontent.com/gumanba/Scripts/main/BridgeBattles"))()Script #2 Bridge Battles Pro Hub
-- Bridge Battles Pro Hub (Brick Tool + WalkSpeed 45 + Silent Aim)
local Rayfield = loadstring(game:HttpGet('https://sirius.menu/rayfield'))()
local Window = Rayfield:CreateWindow({Name = "Bridge Battles Pro Hub", ConfigurationSaving = {Enabled = false}})

-- Tabs
local MainTab = Window:CreateTab("Combat & Movement", 4483345998)

local Players = game:GetService("Players")
local Workspace = game:GetService("Workspace")
local player = Players.LocalPlayer
local camera = Workspace.CurrentCamera

local maxWalkSpeed = 16
local silentAimActive = false
local aimFOV = 300

-- Controls
MainTab:CreateSlider({
   Name = "WalkSpeed",
   Range = {16, 45},
   Increment = 1,
   CurrentValue = 16,
   Flag = "CustomSpeed",
   Callback = function(Value)
      maxWalkSpeed = Value
      if player.Character and player.Character:FindFirstChildOfClass("Humanoid") then
          player.Character:FindFirstChildOfClass("Humanoid").WalkSpeed = maxWalkSpeed
      end
   end,
})

MainTab:CreateToggle({
   Name = "Enable RPG Silent Aim (Enemies Only)",
   CurrentValue = false,
   Callback = function(Value) silentAimActive = Value end,
})

MainTab:CreateSlider({
   Name = "Aim FOV Radius",
   Range = {50, 600},
   Increment = 10,
   CurrentValue = 300,
   Flag = "AimFOV",
   Callback = function(Value) aimFOV = Value end,
})

-- Helper function to find closest enemy on a different team
local function getClosestEnemy()
    local closestTarget = nil
    local shortestDistance = aimFOV

    for _, targetPlayer in ipairs(Players:GetPlayers()) do
        if targetPlayer ~= player then
            local isEnemy = true
            if player.Team and targetPlayer.Team and player.Team == targetPlayer.Team then
                isEnemy = false
            end

            if isEnemy and targetPlayer.Character and targetPlayer.Character:FindFirstChild("HumanoidRootPart") then
                local humanoid = targetPlayer.Character:FindFirstChildOfClass("Humanoid")
                if humanoid and humanoid.Health > 0 then
                    local vector, onScreen = camera:WorldToViewportPoint(targetPlayer.Character.HumanoidRootPart.Position)
                    if onScreen then
                        local screenMagnitude = (Vector2.new(vector.X, vector.Y) - Vector2.new(camera.ViewportSize.X / 2, camera.ViewportSize.Y / 2)).Magnitude
                        if screenMagnitude < shortestDistance then
                            shortestDistance = screenMagnitude
                            closestTarget = targetPlayer.Character.HumanoidRootPart
                        end
                    end
                end
            end
        end
    end
    return closestTarget
end

-- Speed enforcement loop
task.spawn(function()
    while task.wait(0.2) do
        pcall(function()
            local character = player.Character
            if not character then return end
            local humanoid = character:FindFirstChildOfClass("Humanoid")
            if humanoid and humanoid.WalkSpeed ~= maxWalkSpeed then
                humanoid.WalkSpeed = maxWalkSpeed
            end
        end)
    end
end)

-- Metatable hook for intercepting weapon firing / RPG projectiles
local mt = getrawmetatable(game)
local oldNamecall = mt.__namecall
setreadonly(mt, false)

mt.__namecall = newcclosure(function(self, ...)
    local method = getnamecallmethod()
    local args = {...}

    if silentAimActive and method == "FireServer" and (string.find(string.lower(self.Name), "shoot") or string.find(string.lower(self.Name), "fire") or string.find(string.lower(self.Name), "rocket") or self.Name == "Hit" or self.Name == "Attack") then
        local targetPart = getClosestEnemy()
        if targetPart then
            for i, v in ipairs(args) do
                if typeof(v) == "Vector3" then
                    args[i] = targetPart.Position
                elseif typeof(v) == "Instance" and v:IsA("BasePart") then
                    args[i] = targetPart
                end
            end
            return oldNamecall(self, unpack(args))
        end
    end

    return oldNamecall(self, ...)
end)

setreadonly(mt, true)
Rayfield:LoadConfiguration()local PathfindingService = game:GetService("PathfindingService")
local Workspace = game:GetService("Workspace")

-- Define targets (e.g., Brick Supply location and Bridge building location)
local brickSpawnPoint = Vector3.new(0, 5, 50)
local bridgeBuildPoint = Vector3.new(0, 5, -100)

local function walkToTarget(humanoid, destination)
    local rootPart = humanoid.Parent:FindFirstChild("HumanoidRootPart")
    if not rootPart then return end

    -- Create a path configuration based on agent parameters
    local path = PathfindingService:CreatePath({
        AgentRadius = 2,
        AgentHeight = 5,
        AgentCanJump = true,
        WaypointSpacing = 4
    })

    -- Compute the path from current position to target
    local success, errorMessage = pcall(function()
        path:ComputeAsync(rootPart.Position, destination)
    end)

    if success and path.Status == Enum.PathStatus.Success then
        local waypoints = path:GetWaypoints()

        for _, waypoint in ipairs(waypoints) do
            -- Handle jump actions if obstacles are present
            if waypoint.Action == Enum.PathWaypointAction.Jump then
                humanoid.Jump = true
            end

            -- Move to the current waypoint and wait until arrival
            humanoid:MoveTo(waypoint.Position)
            humanoid.MoveToFinished:Wait()
        end
    else
        warn("Path generation failed: ", errorMessage)
    end
end

-- Example usage loop for an in-game NPC helper:
local function startSupplyRoutine(character)
    local humanoid = character:FindFirstChildOfClass("Humanoid")
    if not humanoid then return end

    -- Step 1: Walk to brick collection area
    walkToTarget(humanoid, brickSpawnPoint)
    task.wait(1) -- Simulate picking up items

    -- Step 2: Walk to bridge construction area
    walkToTarget(humanoid, bridgeBuildPoint)
    task.wait(1) -- Simulate building block placement
endHow to use these scripts?
Follow these quick steps to get the script running in Bridge Battles! game.
- Download a Script Executor – I only recommend Hydrogen, AWP.GG, Delta, Fluxus, or Codex.
- Attach the Executor – Open the executor and connect it to your Roblox game process.
- Paste the Script – Copy the code above and paste it into the executor.
- Activate Features – Click the Execute button so the script injects and features will activate automatically.
Game Details:
- Name: Bridge Battles!
- Developer: STUDMASTER
- Maturity: Mild
- Genre: Action
- Subgenre: Battlegrounds & Fighting
Frequently Asked Questions
What is a Bridge Battles script?
A Bridge Battles script is third-party Lua code intended to run alongside the Roblox game through a compatible script executor.
What features does this Bridge Battles script include?
Different scripts contain different code and features. Check the script menu after it loads to see everything it offers.
How do you use the Bridge Battles script?
Pick a compatible executor such as Hydrogen, MacSploit, AWP.GG, Delta, Fluxus, Codex, launch Roblox and join the game, copy the complete Lua code from the script card above, paste it into the executor’s editor, and click Run or Execute. Compatibility changes over time, so a name here doesn’t guarantee current support.
Can a Bridge Battles script get your Roblox account banned?
Yes. Third-party scripts can violate Roblox rules and may put an account at risk. Only use code from a source you trust, never enter your Roblox password into a script or executor, and test on an alternate account first.
Does the Bridge Battles script work on mobile?
Check whether both the executor and the script support your device and the current Roblox version. Mobile executor support does not guarantee that every script will work.

